1.31.2010

Sundae

Posted by Whitney at 8:29 PM
mini ice cream sundae cake las vegas

"Ice Cream Sundae" made of chocolate base, cake balls with cream cheese frosting, covered in white chocolate and topped with a fondant cherry. Cute!

1.23.2010

Contact Me

Posted by Adam at 4:06 PM


Questions?
Feedback?
Want to set up a free consultation?
Want to place a BabyCake order?

Call me at (702) 508-8704
or...

Flavors

Posted by Adam at 4:05 PM
Basic flavors

White Butter
Chocolate
Moist Yellow
Marble
Red Velvet
Devil's Food


Specialty flavors (additional cost)

Coconut
Almond Dacquoise
Lemon Poppyseed Pound Cake
Almond Hazelnut
Carrot
Apple
Pumpkin Chocolate Chip
Strawberry
Banana


Fillings

Buttercream {Vanilla, Chocolate, Raspberry, Pistachio, Coconut, Custard}
Cream Cheese Frosting
Caramel-Cream Cheese Filling
Caramel Filling
Apricot Filling (in season)
Chocolate Ganache
White Chocolate Mousse
Seedless Raspberry Jam
Strawberry Jam
Lemon Curd


So, what's the price of a cake?

Posted by Adam at 4:05 PM
There's a lot that goes into the cost of a cake! With so many different sizes, flavors, fillings, and detail on the surface of the cake, things can get very complex. I cannot give exact quotes on a cake unless you provide a photo of the exact cake you want, along with your flavor and filling choices. Otherwise, an exact quote will be provided at your free consultation. Despite these limitations, I can provide estimates based on the size and details of your cake.


Round/Square Tiers*
Number of Servings
Basic Price
Complex Design and Flavor
6” x 4”
12
$35
$75
8” x 4”
24
$60**
$110
10” x 4”
38
$85
$150
12” x 4”
56
$110
$180
14” x 4”
78
$135
$215
16” x 4”
100
$160
$250
*all dimensions are diameter x height
**all prices are for ONE tier only


- - - - - - - - - - - - - - - - - - - - - - - - - - - - - - - - - - - - - - - - - - - - - - - - - - - - - - - - -

BabyCakes

BabyCakes contain 2-3 servings per cake.

All of the same Flavors and fillings apply to BabyCakes and specialty flavors cost $1 extra per cake.

Pricing for BabyCakes are shown below:

Julie.............. $29
Sundae......... $13
Rachel......... $27
Belle............. $ 25
Lucy............. $25
Staci............. $27


Custom BabyCakes are also available for an extra $5 (no matter how large or small your order).

Orders of 10 or more BabyCakes will be delivered anywhere in the Las Vegas valley free of charge. Otherwise, delivery will be charged at $0.75 per mile round trip.

BabyCakes

Posted by Adam at 4:05 PM
BabyCakes are miniature versions of regular cakes. They can be used as gifts, party favors, individual desserts, or as centerpieces for your tables. For $1 extra, you can have your BabyCake packaged as shown below.


Rachel
miniature baby cake las vegas edding cakes


las vegas miniature wedding cake

las vegas miniature wedding cake baby cake

- - - - - - - - - - - - - - - - - - - - - - - - - - - - - - - - - - - - - - - - - - - - - - - - - - - - - - - - -

Belle
las vegas miniature wedding cake baby cake

- - - - - - - - - - - - - - - - - - - - - - - - - - - - - - - - - - - - - - - - - - - - - - - - - - - - - - - - -

Lucy
las vegas miniature wedding cake baby cake

1.22.2010

Hallie

Posted by Whitney at 11:02 PM

Buttercup

Posted by Whitney at 10:59 PM

10.22.2009

Ashton

Posted by Adam at 10:32 PM


10.18.2009

Greg

Posted by Adam at 8:35 PM


50th birthday cake for the marathon man!
Posted by Picasa

9.11.2009

Wii Miis

Posted by Adam at 2:50 PM


Wii Cake for my brother-in-laws 15th!

5.26.2009

UNDER CONSTRUCTION

Posted by Adam at 9:57 PM
Please forgive me while my blog is under construction. I'm trying to make the blog a little more interesting for any viewers, as well as to answer common questions I have about my cakes! Thanks for your patience, it should only be a few days!

5.16.2009

Alec

Posted by Adam at 9:40 PM


I watched the third Harry Potter movie to get some inspiration for this cake. I've read the books, but I needed it fresh on my mind. I didn't take anything from the third movie directly, but it got the wheels turning. Harry travels to and from Hogwarts every year with a rather large and old suitcase, and I wanted to replicate that look. I learned that the best way to make fondant brown is to color it with cocoa powder, NOT to add brown food color (you have to add A LOT of brown to get the color this dark, which alters the taste and texture of the fondant). The books... Magical Me and Potions... were just made in a simple 9x13 pan, trimmed to the size I wanted. The Harry Potter lettering was made with gumpaste and then painted with my new airbrush!! That's what gives the lettering the 2-tone effect. Finally, Harry is made of gumpaste with a glass globe (from a light fixture) around him to give the "Divination" feel. I found the fabulous cake board at Roberts Craft Store. I just love the wood edge. The cake is a simple cake from Martha Stewart and the filling was buttercream and a strawberry cream cheese frosting (just use strawberry cream cheese instead of the plain kind)... yum!!

4.12.2009

Anne

Posted by Adam at 8:06 PM


Inspiration for this cake came from Real Simple Weddings. The cake turned out beautiful (I thought). The fondant draped over the cake perfectly, the ribbon cooperated, and the flower, which was made of gumpaste, turned out awesome. However, the cake itself... chocolate with buttercream filling... was way dry. I checked out my trusty cake book and found that if you brush your cake with a simple syrup before freezing it, the moisture stays in the cake much better! I tried this technique on the Harry Potter cake and it worked great! It can really add a lot of sweetness to the cake though, so you have to balance the syrup with the sugar content of the cake so that it's not too overbearing. Happy baking!

4.07.2009

My very favorite cake website

Posted by Adam at 5:29 PM
I just thought I would share with everyone my very favorite website for cake ideas.

4.03.2009

Madison

Posted by Adam at 2:53 PM


Coconut cake with raspberry filling and buttercream frosting.

This was my first cake where my client wanted buttercream instead of fondant (the coconut cake was BC, but any flaws were easily covered by the coconut!). She wanted a look that was as smooth as fondant, which can be REALLY hard to do. I made sure to practice a lot before I did the real cake, and after trying multiple buttercream frostings, techniques in applying the frosting, etc., I finally figured it all out. I found my buttercream frosting on youtube and I frosted my chilled cake (chilling the cake is very important!!) with an offset spatula and smoothed and leveled the frosting as best as I could with my bench scraper. It's very important to get a crusting buttercream (frosting that gets semi-hard... a little crust on the outside) and chill the cake in between each round of smoothing. The last step is to use these fabulous paper towels...


Don't try to use any other brand!! Viva paper towels are the only thing that work. You can also use a high density foam roller brush, and I usually use a combination of both. Instead of describing how to do it, I'll just post a couple of videos that I found really helpful.

The Upside Down Method
Edna's Method

4.01.2009

Posted by Adam at 11:31 PM

I made this cake in just 3 hours! The stripes aren't perfectly straight, but for a rush job, I thought it turned out decent. Lindsey was throwing a baby shower for a friend, so I thought I would whip out something cute really quick.


This was definitely a trial and error cake. The "straws" are made of white chocolate... they break really easily! I wouldn't recommend trying to make a cake like this unless you REALLY love the look.

The white chocolate straws are made with an old fashioned cheese grater, like this one...


The wire kind (the kind you'll find in most stores these days) won't work...


Get some white chocolate chips and slowly warm them up in the microwave in 30 second increments. Spread them over a cookie sheet to form a nice, even layer. Wait for them to almost completely harden and start peeling with even pressure. If it comes off in chunks, it's still too soft. If it just flakes off, it's too hard. It really takes a lot of practice to master, and I highly recommend freezing the straws right after you peel them so that they don't melt. When applying them to the cake, the faster you work, the better. They're fragile and they melt really easily!! Like I said, you have to really love the look to have the patience for it. I don't think I'll ever do another one unless a client wants it!

3.04.2009

Jane

Posted by Adam at 12:04 PM

I love this cake. Green and white is my favorite color combination. The piping was a lot more fun than I expected and turned out pretty well!

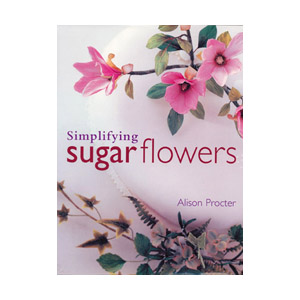
The flowers for this cake were inspired by some of the flowers in my Simplifying Sugar Flowers book, although I did improvise quite a bit.

The inspiration for the lattice pattern came from a fabric swatch from Ballard Designs.

2.08.2009

Nathan's Birthday

Posted by Adam at 11:32 AM


This is a birthday cake of the late Jacob's Field in Cleveland, Ohio. It is made of gumpaste, fondant, and royal icing.

1.23.2009

Cara Wedding

Posted by Adam at 1:49 PM


4 tier coconut wedding cake in buttercream. Top tier is coconut cake with strawberry filling. Rest of cake made of styrofoam dummies.

This cake was a lot of work. I had never peeled my own coconut before... and by the time I figured out where to buy big coconut flakes, it was too close to the wedding (not to mention the insane price). So I hauled myself down to the store, bought seven coconuts, and started hacking away with a hammer. The best way to open a coconut is to let it sit in a 400 degree oven for about 10 minutes. Take it out and push on the coconut's eyes to find the softest one. Pound a decently thick nail into the softest eye with a hammer and shake the coconut milk out (I use the coconut milk in my coconut cake, just make sure you boil out the impurities and strain out any skin that might have gotten mixed in there!). Then wrap the coconut in a hand towel (to prevent coconut from flying all over the place) and smack the coconut hard with a hammer. Take the wrap off, and WA-LA, a beautiful white, meat filled coconut awaits your peeling. I just use a regular ol' potato peeler. With the coconut warm, the meat should peel off a little more easily. The more pieces of coconut you break your coconut into, the easier it is to peel due to its concave nature.
The cake here also has regular long (or large, depending on the store) coconut shavings on it as well.

12.18.2008

Mario!

Posted by Adam at 8:30 PM
I made this cake for my husband's birthday. It was a lot of work, but I loved making it! It is entirely edible... the bottom layer is a strawberry cake with cream cheese frosting. The top tier is a funfetti cake, also made with cream cheese frosting.


12.17.2008

Holiday Cake

Posted by Adam at 3:18 PM


Dummy Tiers

Some of the cakes I make, including the one below are made on styrofoam "dummies". Some people prefer dummies because they lower the overall price of the cake. Some people just don't care for cake much, but feel obligated by tradition, so the opt for the dummy tiers. I recommend practicing fondant on dummies before making your first cake. Fondant alone is hard enough to work with, and cake can be very tempramental.


10.05.2008

Kelsey

Posted by Adam at 11:29 AM


This light pink cake is covered in fondant. The branches are made of floral tape and wire and the flowers are made of gumpaste. How did I make the flowers?? With a little help from this book...


And these tools...


I really thought I could get by without the tools. However, if you want to make your flowers look realistic, you HAVE to have this stuff. Otherwise they'll look fake.
 

Email: whitscakes@gmail.com Phone: (702)508-8704
Sweet Celebrations Copyright 2009 Sweet Cupcake Designed by Ipiet Templates Image by Tadpole's Notez